7/29/2009

MODEM INSTALLATION IN LINUX

Red hat-config-network
  1. Click new
  2. Select modem connection
  3. Forward
  4. Probing for modem
  5. Select modem (manually)
  6. Dev/modem
  7. Click forward
  8. Select provider
  9. Prefix area code phone number
  10. 91 040 112233
  11. Provider name: - BSNL
  12. Login name Password
  13. Click forward
  14. Select automatically obtain IP address setting.
  15. Click forward
  16. Click apply
  17. Select modem
  18. Click activate
  19. Click YES
  20. Click OK
  21. After the modem Installation we want access Internet.
  22. Right click desktop.
  23. Open terminal.
  24. Kppp
  25. Connect to popup open.
  26. Select login name and password.
  27. Click connect

PRINTER INSTALLATION IN LINUX

Printer installation in graphical mode
Main menu
System settings
Printing
Red hat-config-printer
Click new
Add a new print queue
Click forward
Queue name
Click forward

Select a queue type.

1. Locally connected.
2. Network cups (IPP)
3. Networked UNIX (LPD)
4. Networked windows (SMB)
5. Networked novel (NCP)
6. Networked jet direct.
Select locally connected
Select /dev/lpo
Click forward
Select printer manufacture and model.
Click forward (hp lacer 6l)
Click apply

Printer Installation in Text Mode
#Red hat-config-printer
Click new
Type Queue name and select Queue type.(Local printer device)
Click next
Select device path/dev/lpo
Click next
Select printer manufacture and model name
Click next
Click finish

NETWORK CONFIGURATION IN LINUX


Redhat-config-network

Start
Main menu
System settings
Network
Click new
Select LAN Ethernet connection
Click forward
Select statically set IP address
Type 192.168.100.5
Subnet mask
Type 255.255.255.0
Click forward
Click apply
Click active option
Select YES
Click OK
To check LAN card address
#IF config

LINUX FILE AND DIRECTORY PERMISSIONS

There are two types of permission modes
They are 

1.Symbolic mode.
2. Absolute mode.

Symbolic mode: - Read =R User =U
Write =W Groups =G
Execute =X Other =O

#Chmod G+W file name
#Chmod G-W file name
 (“-RW-R—R--)

[-Indicates file, RW-indicates users, R—indicates groups, R— others.
Screen graphical mode “CRLT+ALT+F7”

Absolute mode: -

Read =4
Write =2
Execute =1

#Chmod 7 7 7filename

User group other
4+2+1 4+2+1 4+2+1

Linux files are setup so access to them is controlled. There are three types of access:
  1. read
  2. write
  3. execute
Each file belongs to a specific user and group. Access to the files is controlled by user, group, and what is called other. The term, other, is used to refer to someone who is not the user (owner) of the file, nor is the person a member of the group the file belongs to. When talking about setting permissions for "other" users to use, it is commonly referred to as setting the world execute, read, or write bit since anyone in the world will be able to perform the operation if the permission is set in the other category.

File names and permission characters

File names can be up to 256 characters long with "-", "_", and "." characters along with letters and numbers.
When a long file listing is done, there are 10 characters that are shown on the left that indicate type and permissions of the file. File permissions are shown according to the following syntax example: drwerwerwe
There are a total of 10 characters in this example, as in all Linux files. The first character indicates the type of file, and the next three indicate read, write, and execute permission for each of the three user types, user, group and other. Since there are three types of permission for three users, there are a total of nine permission bits. The table below shows the syntax:

12345678910
FileUser PermissionsGroup PermissionsOther Permissions
TypeReadWriteExecuteReadWriteExecuteReadWriteExecute
drwerwerwe


  • Character 1 is the type of file: - is ordinary, d is directory, l is link.
  • Characters 2-4 show owner permissions. Character 2 indicates read permission, character 3 indicates write permission, and character 4 indicates execute permission.
  • Characters 5-7 show group permissions. Character 5=read, 6=write, 7=execute
  • Characters 8-10 show permissions for all other users. Character 8=read, 9=write, 10=execute
There are 5 possible characters in the permission fields. They are:
  • r = read - This is only found in the read field.
  • w = write - This is only found in the write field.
  • x = execute - This is only found in the execute field.
  • s = setuid - This is only found in the execute field.
  • If there is a "-" in a particular location, there is no permission. This may be found in any field whether read, write, or execute field.

Examples

Type "ls -l" and a listing like the following is displayed:
total 10


drwxrwxrwx4georgeteam1122Dec 12 18:02Projects
-rw-rw-rw-1george team11873Aug 23 08:34test
-rw-rw-rw-1georgeteam11234Sep 12 11:13 datafile
Which means the following:
Type and# ofFiles'sFile'sSize in Date of lastFilename
Permission fieldLinksOwnerGroupBytesmodification
drwxrwxrwx 4georgeteam1122Dec 12 18:02Projects
The fields are as follows:
  1. Type field: The first character in the field indicates a file type of one of the following:
    • d = directory
    • l = symbolic link
    • s = socket
    • p = named pipe
    • - = regular file
    • c= character (unbuffered) device file special
    • b=block (buffered) device file special
  2. Permissions are explained above.
  3. Links: The number of directory entries that refer to the file. In our example, there are four.
  4. The file's owner in our example is George.
  5. The group the file belongs to. In our example, the group is team1.
  6. The size of the file in bytes
  7. The last modification date. If the file is recent, the date and time is shown. If the file is not in the current year, the year is shown rather than time.
  8. The name of the file.

Set User Identification Attribute

The file permissions bits include an execute permission bit for file owner, group and other. When the execute bit for the owner is set to "s" the set user ID bit is set. This causes any persons or processes that run the file to have access to system resources as though they are the owner of the file. When the execute bit for the group is set to "s", the set group ID bit is set and the user running the program is given access based on access permission for the group the file belongs to. The following command:

chmod +s myfile

sets the user ID bit on the file "myfile". The command:
chmod g+s myfile
sets the group ID bit on the file "myfile".
The listing below shows a listing of two files that have the group or user ID bit set.

-rws--x--x   1 root    root    14024 Sep  9 1999 chfn

-rwxr-sr-x   1 root   mail    12072 Aug 16 1999 lockfile

The files chfn and lockfile are located in the directory "/usr/bin". The "s" takes the place of the normal location of the execute bit in the file listings above. This special permission mode has no meaning unless the file has execute permission set for either the group or other as well. This means that in the case of the lockfile, if the other users (world execute) bit is not set with permission to execute, then the user ID bit set would be meaningless since only that same group could run the program anyhow. In both files, everyone can execute the binary. The first program, when run is executed as though the program is the root user. The second program is run as though the group "mail" is the user's group.

For system security reasons it is not a good idea to set many program's set user or group ID bits any more than necessary, since this can allow an unauthorized user privileges in sensitive system areas. If the program has a flaw that allows the user to break out of the intended use of the program, then the system can be compromised.

Directory Permissions

There are two special bits in the permissions field of directories. They are:
  • s - Set group ID
  • t - Save text attribute (sticky bit) - The user may delete or modify only those files in the directory that they own or have write permission for.

Save text attribute

The /tmp directory is typically world-writable and looks like this in a listing:

drwxrwxrwt   13 root     root         4096 Apr 15 08:05 tmp

Everyone can read, write, and access the directory. The "t'' indicates that only the user (and root, of course) that created a file in this directory can delete that file.


To set the sticky bit in a directory, do the following:
chmod +t data
This option should be used carefully. A possible alternative to this is
  1. Create a directory in the user's home directory to which he or she can write temporary files.
  2. Set the TMPDIR environment variable using each user's login script.
  3. Programs using the tempnam(3) function will look for the TMPDIR variable and use it, instead of writing to the /tmp directory.

Directory Set Group ID

If the setgid bit on a directory entry is set, files in that directory will have the group ownership as the directory, instead of than the group of the user that created the file.

This attribute is helpful when several users need access to certain files. If the users work in a directory with the setgid attribute set then any files created in the directory by any of the users will have the permission of the group. For example, the administrator can create a group called spcprj and add the users Kathy and Mark to the group spcprj. The directory spcprjdir can be created with the set GID bit set and Kathy and Mark although in different primary groups can work in the directory and have full access to all files in that directory, but still not be able to access files in each other's primary group.

The following command will set the GID bit on a directory:
chmod g+s spcprjdir
The directory listing of the directory "spcprjdir":
drwxrwsr-x 2 kathy spcprj 1674 Sep 17 1999 spcprjdir
The "s'' in place of the execute bit in the group permissions causes all files written to the directory "spcprjdir" to belong to the group "spcprj" .

Umask Settings

The umask command is used to set and determine the default file creation permissions on the system. It is the octal complement of the desired file mode for the specific file type. Default permissions are:
  • 777 - Executable files
  • 666 - Text files
These defaults are set allowing all users to execute an executable file and not to execute a text file. The defaults allow all users can read and write the file.

The permission for the creation of new executable files is calculated by subtracting the umask value from the default permission value for the file type being created. An example for a text file is shown below with a umask value of 022:

   666 Default Permission for text file

    -022 Minus the umask value

      644 Allowed Permissions
Therefore the umask value is an expression of the permissions the user, group and world will not have as a default with regard to reading, writing, or executing the file. The umask value here means the group the file belongs to and users other than the owner will not be able to write to the file. In this case, when a new text file is created it will have a file permission value of 644, which means the owner can read and write the file, but members of the group the file belongs to, and all others can only read the file. A long directory listing of a file with these permissions set is shown below.

-rw-r--r--   1 root     workgrp          14233 Apr  24 10:32 textfile.txt

A example command to set the umask is:
umask 022
The most common umask setting is 022. The /etc/profile script is where the umask command is usually set for all users.

Red Hat Linux has a user and group ID creation scheme where there is a group for each user and only that user belongs to that group. If you use this scheme consistently you only need to use 002 for your umask value with normal users.
Linux Vi Editor commands

VI Commands:


i
insert mode, (ESC to exit insert mode) allows text to be entered on the screen
a
Append to right mode
/word
Move to the occurrence of "word"
n
Locate the next occurance
w
Advance to the next word
e
Advance to the next end of a word
b
Move to the previous word
3b
Move backward 3 words
dd
delete line
3dd
delete 3 lines
D
Delete remainder of a line
dw
Delete word
x
Delete character
o
Open space for new line below the cursor line
O
Open a line above the cursor
CTRL-w
Move back a word in append mode
u
Undo last
U
Undo all changes to current line


In command mode, repeat the last text changing the command on the current line
:w newfilename
save the file to newfilename from the command mode


:wq
save and quit
:q!
quit without saving
r
replace then typa a character ot be replaced with r then return to break up a line
J
join 2 lines
s
substitute (sentence) typed text over a character, ESC when done
cw
change word
c
change part of a line from the cursor to the end of the line
cc
substitute new text for aline, ESC when done
h
move the cursor back one space
H
move the cursor to the highest line on the screen
L
move the cursor to the lowest line on the screen
M
position the cursor at the midpoint on the screen
G
last line in the file
0 (zero)
Move the cursor to the beginning of the line it is on
view filename
Open a file for viewing only
set number
Turn on line numbers
set nonumber
Turn off line numbers

Options:


number

autoindent (ai)
ctrl-d to move to the left
showmatch
match brackets and parenthesis
tabstop=4

wrapmargine(wm)
when line is wrapped (80-value)
:2 copy 4
Place a copy of line 2 after line 4.
:1,4
copy 7 (lines 1-4)
:n
Access the next file for editing

7/26/2009

BASIC ELECTR0NICS

Introduction of electronics: -

 It has a branch of engineering which deals with the flow of electrons charges and its reactions through a conductor that may be either a gas tube, vacuum tube
I) Element: - A matter composed only one kind of atom is called element

2) Matter: - A body which has a definite weight and which occupy some space is called matter. It has 3 states 1) Solid 2) Liquid 3) Gas.

3) Molecular: - A smallest particle of matter, which contains all physical and chemical properties that of matter is called molecular.

4) Atom: - A smallest particle of mater which can take part in chemical reaction and can separated by chemical reaction but has no free existence. Which contains protons, neutrons and electrons? Atom has two parts 1) Nuclear 2) Electrons around the orbit.

5) Atomic structure: - According to J.J. Thomson molecules is the smallest particle but after words they can be known for atom is the smallest particle.

6) Atom Contains: - Atom contains there are three smallest particles, which are: -

1) Protons: - It is '+' ve charge. Rooter Ford invents these protons. One proton is equal to 1/1840 electron. Protons are positive charge 1.
2) Neutron: - It is "0" charge. Chadwick invents these neutrons.
3) Electron: - It is '-' charge. J.J.Thomson invents this electron; Electron negative charge of 1.602*10 to the power of -19 C. Flow of electron is 6.28*10 to the power of 18 per second.

ELECTRICITY

1) Electricity: - It is a sort of energy that can be expressed we cannot see but we can feel of electricity can produced high heat motion attraction Repulsion etc. This electricity discovered by ampere.

2) Electronics: - The branch of science that deals with behaviors and application of electrons and other changes carriers is called electronic.

Electricity produced in 4 way's

1)Hydro electric
2) Thermo electric
3) Nuclear electric
4) Solar electricity
Electricity can generate by many ways we use very few methods.
Current: - The free flow of electrons is called current is measured by Ampere. Letter “I” donates it

The speed of electric current is 3*10 to the power of 8 m/sec

Current is mainly 2 types.
1) Ac - Alternating current
2) Dc - Direct current.

A.C: - The current whose magnitude and direction remains attempting at a definite rate is called AC current.

DC: - The current whose magnitude and direction remains constant is called DC current.
5) Voltage: - The pressure of required moving the electrons from one place to anther place is called voltage. The Voltage units are volts. ‘V’ donates it and its voltage checked by voltmeter.
6) Power: - The combination of voltage and current is called power, units of power waltz; it’s donated by 'P'. Therefore P=VI. Another formula: - The rate of change of work is called power.

Work done W

Time T

These three means current voltage and power are called electricity
7) Frequency: - The number of cycle in one second in a medium is known as frequency it is donated by 'F. In 1965 an honors of German scientist Henrich Rudolph Hertz this units in changed in Hertz and donated by as HZ.

The relationship of HZ
1000 HZ = 1 Kilo HZ
1000 K HZ = 1 Mega HZ
1000 M HZ= 1 Gega HZ

8) Wave: - A periodic disturbances either continuous or transient that is propagation through a medium or through space or in which the displacement from a mean value is a function of time or position or both is known as was a complete wave makes an angle is 360 degrees.
Positive help cycle is known as maximum amplitude and Negative half cycle is known as minimum amplitude.

Mainly the frequency is two types: -

1) Low frequency
2) High frequency

1) Low frequency: - The frequency in which the maximum and minimum (Amplitude) of waves are low in comparison to the wavelength is known as low frequency.

2) High frequency: - The frequency in which the (Amplitude) maximum and minimum is more in compaction with the wavelength is known as high frequency.

ABBREVIATIONS FOR BASIC ELECTRONIC

-->

BJT = Bipolar Junction Transistor

ü UJT = Uni polar Junction Transistor
ü MOSFET = Metal Oxide Semiconductor Field Effective Transistor
ü NTC = Negative Temperature Coefficient
ü PTC = Positive Temperature Coefficient
ü LDR = Light Depending Resistor
ü VDR = Voltage Depending Resistor
ü Transformer is working AC condition
ü RADAR stands for Radio Angle Detection and Ranging
ü LASER stands for Light Amplification stimulated Emission and Radiation
ü BHT stands for Boost High tension Transformer
ü EHT stands for Extra High tension Transformer
ü VDU stands for Visual Display Unit
ü LCD stands for Liquid Crystal Display
ü TTL stands for Transistor and Transistor Logic
ü SCR stands for Silicon Control Rectifier
ü STR stands for Silicon Triggering Rectifier
ü STD stands for Subscribed Trunk Dialing
ü ISD stands for International Subscribed Dialing
ü VLF stands for Very Large Frequency
ü EHF stands for Extra High Frequency
ü IFT stands for Intermediate Frequency Transformer
ü Transformer is working Mutual Inductance Principle.
ü Coil is working Self Inductance Principle
ü Units of Power Watts
ü Units of Charge Coulombs
ü Units of Frequency Hertz’s (Hz)
ü Units of Current Amperes
ü Units of Voltage Volts
ü Units of Impedance Ohms
ü Units Resistance Ohms
ü Resistance is indicated by R letter
ü Units of Capacitance Farads
ü Units of Coil Henry
ü Units of EMF (Electro Motive Force) Volts
ü Units of MMF (Magnetic Motive Force) Ampere Turns
ü Units of Illumination Lax
ü Units of Luminous Intensity Candella
ü Units of Angular Frequency Radians
ü Units of Force Newton’s
ü Units of Temperature Degree Centigrade
ü Units of Heat Calories
ü Units of Sound Disables
ü Coil is represented by L letter.
ü AFC stands for Automatic Frequency Controller
ü BHT stands for Boost High-tension Transformer
ü FOT stands for Field Output Transformer
ü Driver Transformer is also called Chopper Transformer or 1:1 Transformer or Ration Transformer
ü Signal Diode is also called Point Contact Diode or Cat whisker Diode
ü LED stands for Light Emitting Diode.

Full forms of International Business Machines


v CMOS = Complementary metal oxide semiconductor
v BIOS = Basic Input and Output System
v SMART = Self Monitoring Analysis Reporting Technology
v SCSI = Small Computer System Interface
v DMA = Direct Memory Access
v MODEM = Modulation and Demodulation
v PCXT = Personnel Computer with extended Technology
v PCAT = Personnel Computer with Advance Technology
v ASPI = Advance Semi Programme Interface
v AVI = Audio Video Interface
v ADF = Adopter description File
v MCA = Micro channel Architecture
v ANSI = American National Standard Institute
v ASCII = American Standard Code for Information Interchange
v ATI = Application Programme Interface
v ARCNET = Attached Resources computer network
v AIR = Advanced Integrated Research
v BIX = Byte Information Exchange
v BNC = British Network Connector
v SVGA = Super Video Graphic Adopter
v ISA = Industry Standard Architecture
v AGP = Axilory Graphical Port
v ATM = Automatic Teller Machine
v UPS = Uninterrupted Power Supply
v EPROM = Erasable Programmable Read Only Memory
v EEPROM = Electrical Erasable Programmable Read Only Memory
v CGA = Color Graphical Adopter
v SIDE = Super Integrated Device Electronics
v PCI = Peripheral Component Interface
v ATAPI = Advanced Technology Attachment Package Interface
v VFAT = Virtual File Allocation Table
v CRO = Cathode Ray Oscilloscope
v CRT = Cathode Ray Tube
v DRAM = Dynamic Random Access Memory
v MSCDEX.EXE = Microsoft Compact Disk Executive Extension File
v UTP = Unshielded Twisted Pair Cable
v USB = Universal Series Bus
v IBM = International Business Machines

Definition of OS (Operating System)

-->
Ø Operating system : - It is an interface between the user and computer Or hard-ware and software combined to gather is Known as o/s
Ø Transmit : - To send data from one system to other system is called Transmit
Ø Bandwidth: - Data Transmission Speed Is Called As Bandwidth.
Ø Wins: - Windows Internet Naming Services.
Ø Repeaters: - doesn’t amplify the signals.
Ø Router: - it allows two connect to different networks.
Ø Nntp: - Network News Transfer Protocol.
Ø SMTP: - Simple Mail Transmission Protocol.
Ø HDLC: - High Level Data Link Control, used for Cisco routers.
Ø SDLC: - Sequential Data Link Control, used for IBM routers.
Ø PPP: - Point To Point Protocol.
Ø Slip: - Synchronous Line Internet Protocol.
Ø ATM: - Asynchronous Transfer Mode.
Ø IBM: - International Business Machine.
Ø LAN: - Local Area Network.
Ø MAN: - metro-politon area network.
Ø WAN: - Wide Area Network.
Ø Mbps: - Mega Bytes per Second.
Ø BNC: - British Naval/Network Connector.
Ø RJ 45: - Remote Jack or Registered Jack 45.
Ø U.T.P: - Unshielded Twisted Pair. Used for LAN
Ø S.T.P: - Shield Twisted Pair. Used for star collection
Ø C.I.D: - Central Interface Device.
Ø M.A.U: - Multi-Station Access Unit.
Ø I.S.O: - International Standard Organization.
Ø OSI: - Open System Interface/ Inter Connection.
Ø Tcp: - Transmission Control Protocol.
Ø Ip: - Internet Protocol.
Ø FOC: - Fiber Optic Cable.
Ø Ram: - Random Access Memory.
Ø Rom: - Read Only Memory. Password root.
Ø HDD: - Hard-Disk Drive.

7/06/2009

how to install fedora 8 version with images


Fedora 8 (codename Werewolf) was released yesterday and it's the most breathtaking version of the Fedora operating system. Not only does this release bring an installable LiveCD for both i686 and x86_64 architectures, but it also comes with exclusive KDE and GNOME LiveCDs.

I always recommend having an empty hard drive for a Linux installation (that means no other operating system on it, no Windows) and you must have a minimum of 10 GB free space for the Fedora installation. Great, now let's begin.

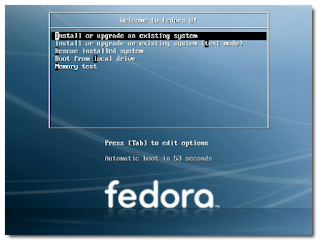
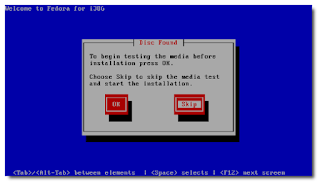
For this installation, I've used the Install DVD, because it contains all the software you'll ever need. However, this DVD has about 3 GB and if you don't have the necessary bandwidth to download it I recommend to get the KDE or the GNOME LiveCD. Burn it on a blank disc with your favorite CD/DVD burning application, then insert the disc in the optical drive of the computer on which you want to install Fedora and boot from it. You'll be presented with a very nice Fedora artwork GRUB splash and some options. At this part, I simply suggest you to press ENTER, and wait for the system to load.


Select the 'Skip' option when you'll be asked if you want to check the media before installation and press ENTER
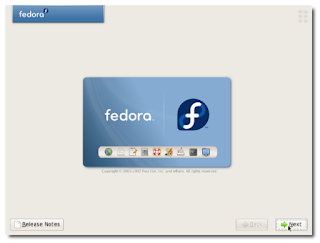
Anaconda (the Fedora installer) will load and you'll see the welcome screen. Click Next
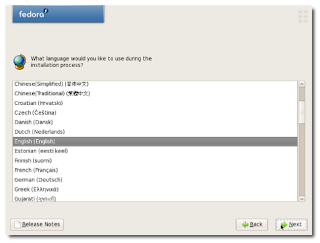
Choose your language:
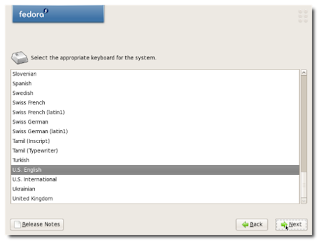
Choose your keyboard layout:

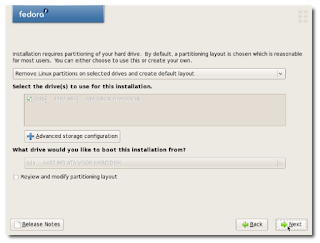
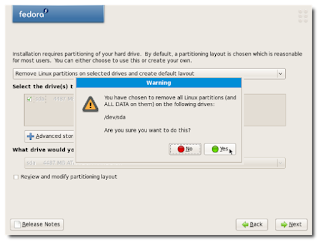
Now, if you have an empty hard drive, all you have to do is click Next (make sure the "Remove Linux partitions on selected drives and create default layout" option is selected). If you don't have an empty hard drive and you still want to install Fedora 8 on your machine, then make sure you select the "Use free space on the selected drives and create default layout" option (10 GB minimum free space is required). Click Next:


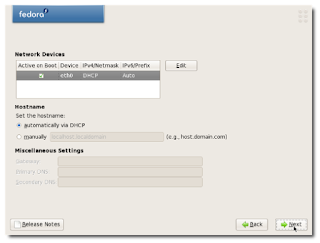
If you have a DHCP network (dynamic IP address) you can click Next right now, but if you have a static IP address (ask your provider if you're not sure) click the "Edit" button and follow the instructions below.

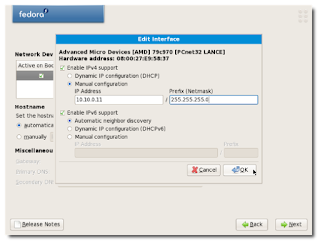
- If you have an IPv4 address, make sure it's enabled. If you have an IPv6 address make sure it's enabled too (if you don't have an IPv6 address, uncheck the 'Enable IPv6 support' option).
- Check the "Manual configuration" option and enter your IP address and the Netmask (ask your provider if you don't know them). Do the same for the IPv6 address (if you have one).
- Click OK once you've finished.
- Select the 'manually' option.
- Optional, you can setup the system's hostname (e.g. john.fedora.linux).
- Enter your Gateway and Primary/Secondary DNS servers (ask your provider if you don't know them).


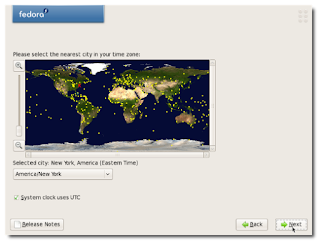
When you're done with the network configuration, click Next and you will be asked to select your location (country/city):

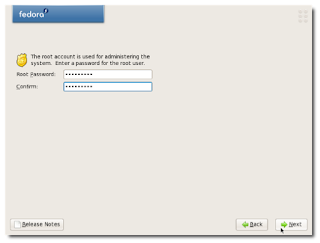
Once you've selected your timezone, click next and you must enter the root (System Administrator) password. The longer, the better (WRITE IT SOMEWHERE OR MEMORIZE IT):


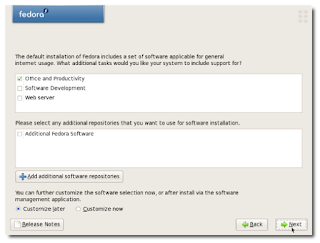
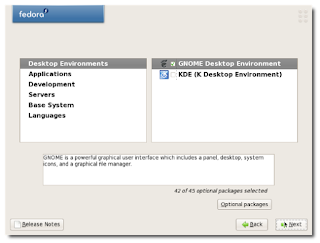
Now you can select the desired packages (or not):

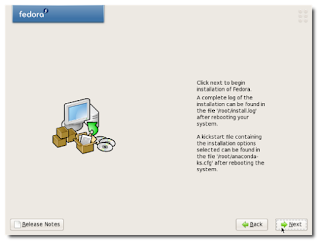
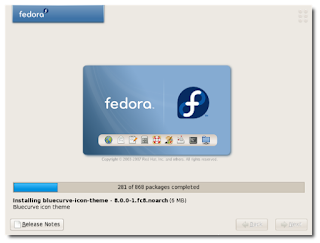
Hit the Next button and everything will be done automatically from now on, just sit back and watch how the partitions are formatted and the software packages are copied to your hard drive, or you can read the latest news while enjoying a cup of coffee. The installation process will take about 8-10 minutes (depending on your computer specs and the selected packages).


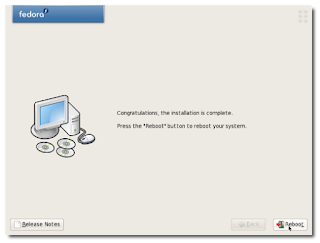
When the installation is over, you will get a "Congratulations, the installation is complete" screen. Click the 'Finish' button and your computer will automatically reboot:
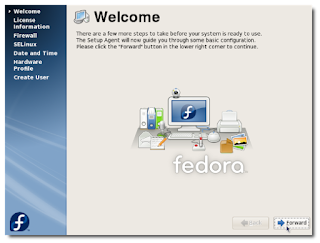
Before you reach the Fedora desktop, you must do a one-time general system configuration:

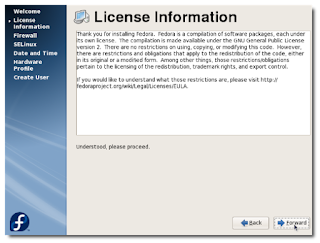
1. Accept the license (it's free, don't worry) and click Forward.
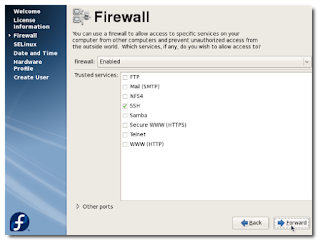
2. Configure your firewall. By default, SSH is checked but if you don't use it, uncheck it!
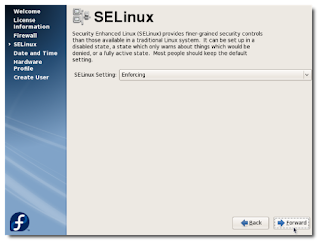
3. Leave SELinux as it is (Enforcing) and click the 'Forward' button.
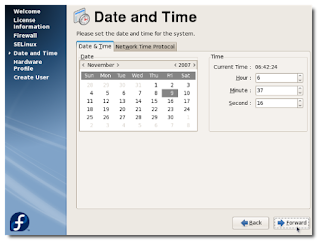
4. Make sure the date and time are correctly setup.
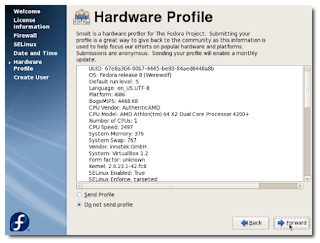
5. Submit your hardware profile to the Fedora Project to help focus their efforts on popular hardware and platforms. The submissions are anonymous, so do it to improve the next Fedora systems!
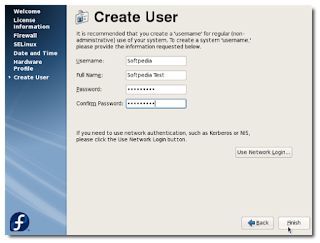
6. Create a user account.


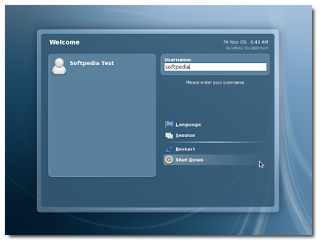
That's it! Now log in to your new Linux OS (with the user and password you've just created):
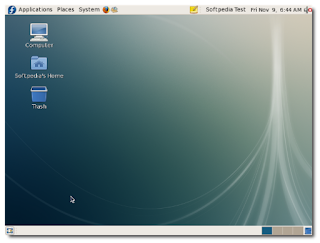
and enjoy the ultimate, spectacular, breathtaking Fedora 8 distribution.

I HOPE YOU HAVE FOLLOWED THE INSTRUCTIONS WELL AND YOU HAVE SUCCESSFULLY INSTALLED FEDORA 8.
THANKS FOR USING MY BLOG.

How to take backup/convert production Linux system without downtime P2V, Image to VHD,VMDK & VDI

How to take backup/convert production Linux system P2V without downtime     Today, we are going to learn How to take backup/conv...